Crafting a cozy abode for your tortoise is easier than you think! Whether you build one from fresh materials or repurpose a second hand item, designing a tortoise enclosure is a super fun way to anticipate the arrival of your new pet or give them a better home.
Here you’ll find 10 DIY plans for indoor and outdoor enclosures. If you live in a subtropical or tropical climate that regularly has 80-90°F temperatures in the daytime and 60-70°F at night, your tortoise can live outside, at least during the warmer seasons. If the weather is typically colder than 70°F, your tortoise will need to live inside under a heat lamp. Even if they’re indoor dwellers, you can still take them outside on hot, sunny days so they can soak up some good old sunshine.

The 10 DIY Tortoise Enclosure Plans
1. Storage Tub Tortoise House by The Turtle Room

| Materials: | Non-toxic plastic storage tub, bedding, houseplants, saucers for food and water, sticks for climbing, medium-size pot or container for shelter, heat lamp |
| Tools: | None |
| Difficulty level: | Easy |
This house is easy to build and simple to transport if you have to move. Simply poke some air holes in the lid and snap it shut to take your tortoise to your next house.
To create this habitat, you’ll need to fill the plastic tub with some bedding. Add the saucers with some food and water in them and include a half-buried pot turned sideways or other container for shelter. Include a stick for your scaly friend to climb up and sunbathe in the light of the heat lamp, and you’re done!
2. Dog Crate Tortoise Enclosure by Pet DIYS

| Materials: | Large dog crate, plywood or tarp for lining, paving stones, dirt for bedding, shelter, flowers, aquarium hut, saucers for food and water |
| Tools: | None |
| Difficulty level: | Moderate |
This creative tortoise abode is easy to make if you can find a used dog crate. Position the crate where the door is on top for easy access to your tortoise and line the bottom with plywood or a tarp. Add the paving stones around the borders and partially fill with bedding. We recommend using sterilized topsoil for the bedding because of the flowers.
We like how this plan featured several small outdoor flowers and succulents as colorful decorations and essential shade. They included a store-bought shelter and an aquarium hut instead of a medium pot, though you’re still welcome to do so.
3. DIY Wooden Enclosure with Chicken Wire by Amphibian Care
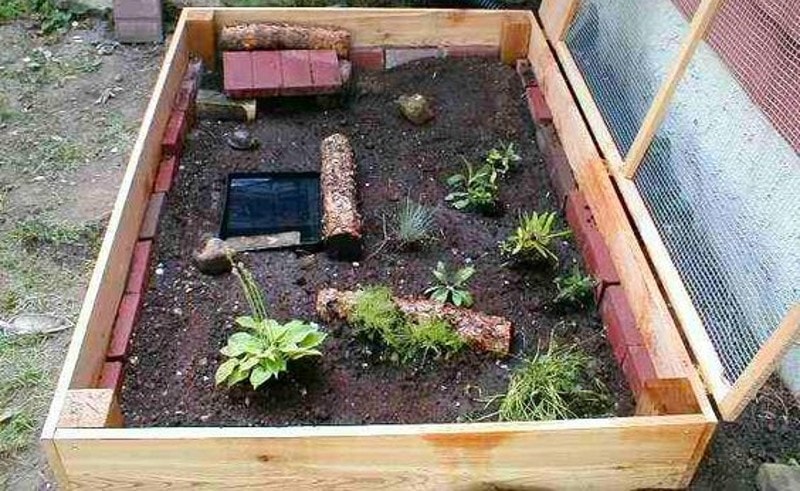
| Materials: | Cedar 1x12s, cedar 4×4 posts, patio bricks, regular sized bricks or rocks of that size, wide chicken wire, garden screen with 1/2 inch holes, peat moss, plastic paint tray |
| Tools: | Edger, saw, hammer, nails, wire-cutter |
| Difficulty level: | Experienced |
If you want a more hands on plan, this is the project for you. This habitat is completely made from scratch and will require woodcutting skills and several tools. While this habitat used cedar boards for the side walls, remember to never use cedar as the bedding because it’s toxic to tortoises when ingested.
4. Amazing Tortoise Table Enclosure by ProjectPet
| Materials: | Wood planks, 6 office chair wheels, colorless wood varnish, thin wood planks, chicken wire |
| Tools: | Miter saw, drill, screwdriver, screws, wood glue |
| Difficulty Level: | Intermediate |
This amazing tortoise table enclosure is a great project for a DIYer with intermediate-level skills. You will need to be experienced in woodworking for this project, as it requires several power tools, such as a miter saw. However, the structure of the enclosure is fairly simple to construct, making this project an excellent way for burgeoning woodworkers to elevate their skills.
The dimensions of this project are 120” L x 80” W x 40” H, so if that is not enough room for your tortoise, you must adjust the measurements accordingly.
5. Grid Cage Tortoise Table by Pet DIYS
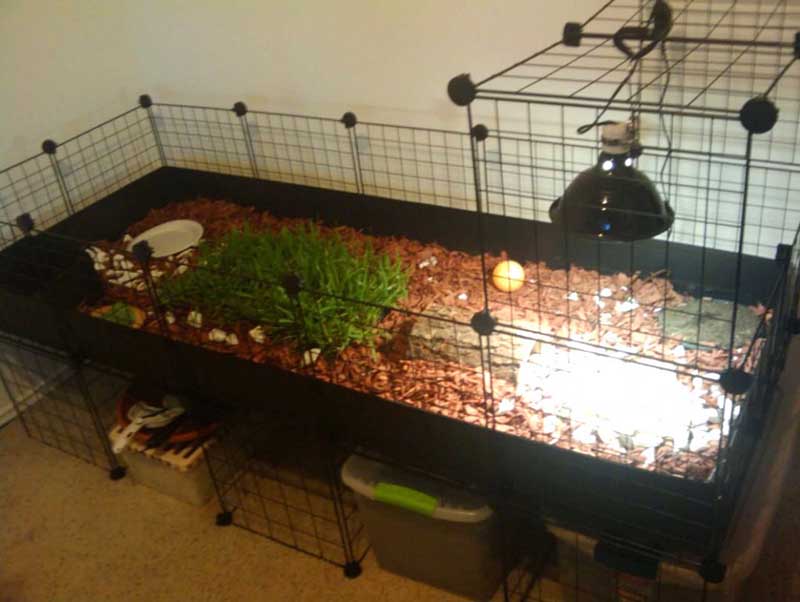
| Materials: | Grid panels, panel connectors, Coroplast |
| Tools: | None |
| Difficulty Level: | Easy |
This DIY plan requires only three materials and no special tools, and it’s a great starting project for a DIY beginner. You can construct a grid cage tortoise table for your pet with grid panels, panel connectors, and Coroplast. Even better, you can purchase the materials at convenient places like Amazon or Walmart.
This project allows a high level of customization, and you can structure the enclosure however you want. Once you have the base made from the grid cage pieces, you can place the Coroplast sheets inside to create the enclosure.
6. Simple Tortoise Table by Pet DIYS

| Materials: | Plywood, wood beams |
| Tools: | Screws, drill, saw |
| Difficulty Level: | Intermediate |
This tortoise table is fairly simple, but it requires power tools. With pieces of plywood, you’ll create a box for your tortoise to sit in. Then, you’ll attach wooden beams to the bottom to create table legs. With smaller scraps of wood, you can construct an overhead apparatus to connect lighting and heating tools. However, that part is not required if you already have a structure that provides your tortoise’s lighting needs.
7. Repurposed Dresser Enclosure by Jeremy Peart
| Materials: | Old dresser, glass sheet, paint (optional) |
| Tools: | Saw |
| Difficulty Level: | Easy |
Few tortoise enclosures blend as perfectly with your furniture as this repurposed dresser enclosure. With this DIY plan, you can give an old and unused dresser new life by creating space in the drawers for your tortoise to roam.
Although this plan requires a power tool, the cuts are simple enough to make this an easy DIY project. All you will need to do is cut out a rectangular opening at the top of the dresser to place a glass sheet inside so you can always see your pet. In this tutorial, the creator constructed the entire dresser from scrap, which is much more difficult but offers a high level of customization.
8. Bookshelf Tortoise Enclosure by Tort Addiction

| Materials: | Old bookshelf, tub, plywood, vinyl flooring, adhesive |
| Tools: | Screws, sealant, silicone caulking or duct tape, saw, drill, belt sander |
| Difficulty Level: | Intermediate |
If you love reusing old furniture but aren’t interested in the repurposed dresser project, check out this reclaimed bookshelf tortoise enclosure! While this project will be more difficult than the repurposed dresser, it creates a stunning finished product.
By flipping the dresser on its front, you can cut a rectangular hole in the back that fits the size of your tortoise’s tub. You can prop pieces of wood up, attaching them around the sides to create an even larger enclosure. There’s a lot of room to customize this project, so feel free to get creative with it.
9. Indoor Crate Enclosure by Calico Road

| Materials: | Wooden pallets, plastic pot tray, indoor/outdoor carpet |
| Tools: | Caulking, caulk gun, screws, drill, saw |
| Difficulty Level: | Expert |
For expert DIYers in search of a challenge, you have just found one. This indoor crate enclosure requires a significant amount of materials and tools. You will construct the enclosure from wooden pallets, which you may be able to find for free at your local hardware store. The dimensions for this project are suitable for one tortoise, so if you have several you want to house, you will need to modify the measurements accordingly.
10. Planter Box Tortoise Table by Pet DIYS

| Materials: | Planter box |
| Tools: | Duct tape |
| Difficulty Level: | Easy |
This is a great tortoise table for anyone who wants to match their pet’s enclosure to their home aesthetic. By using a planter box of your choice, you can pick out the right look to blend in with your home décor. You can repurpose an unused planter box or purchase a new one from your local hardware store.
In the example shown, the creator attaches the heat source and light to the planter box with duct tape. If that look isn’t your style, you can modify this by using zip ties or other attachments that better suit the look you’re aiming for.
Things to Consider
Tortoises prefer bedding materials like mulch, coconut husks, sphagnum moss, or straw pellets to nest in. Sterilized topsoil is a top choice. Keep in mind that whatever material you choose needs to be soft and digestible since tortoises sometimes eat their bedding. You also want it to cushion their fall if they stumble off the roof of their shelter. Never put your tortoise in sand or cedar bedding; both are indigestible, and cedar contains oils that are toxic to them.
Conclusion
No matter what plan you chose for your tortoise’s new home, make sure it includes safe bedding (never use cedar or sand as filler), a heat lamp if it’s indoors, a pot or something to crawl inside for shelter, saucers or shallow bowls to hold its food and water, enough space, and shade.
As long as you give them the essentials, your tortoise is sure to enjoy their new home!
See Also:
- DIY Tortoise Table Plans You Can Make Today
- Does Lavender Oil Kill Fleas? Vet-Approved Tips, Risks, & FAQ
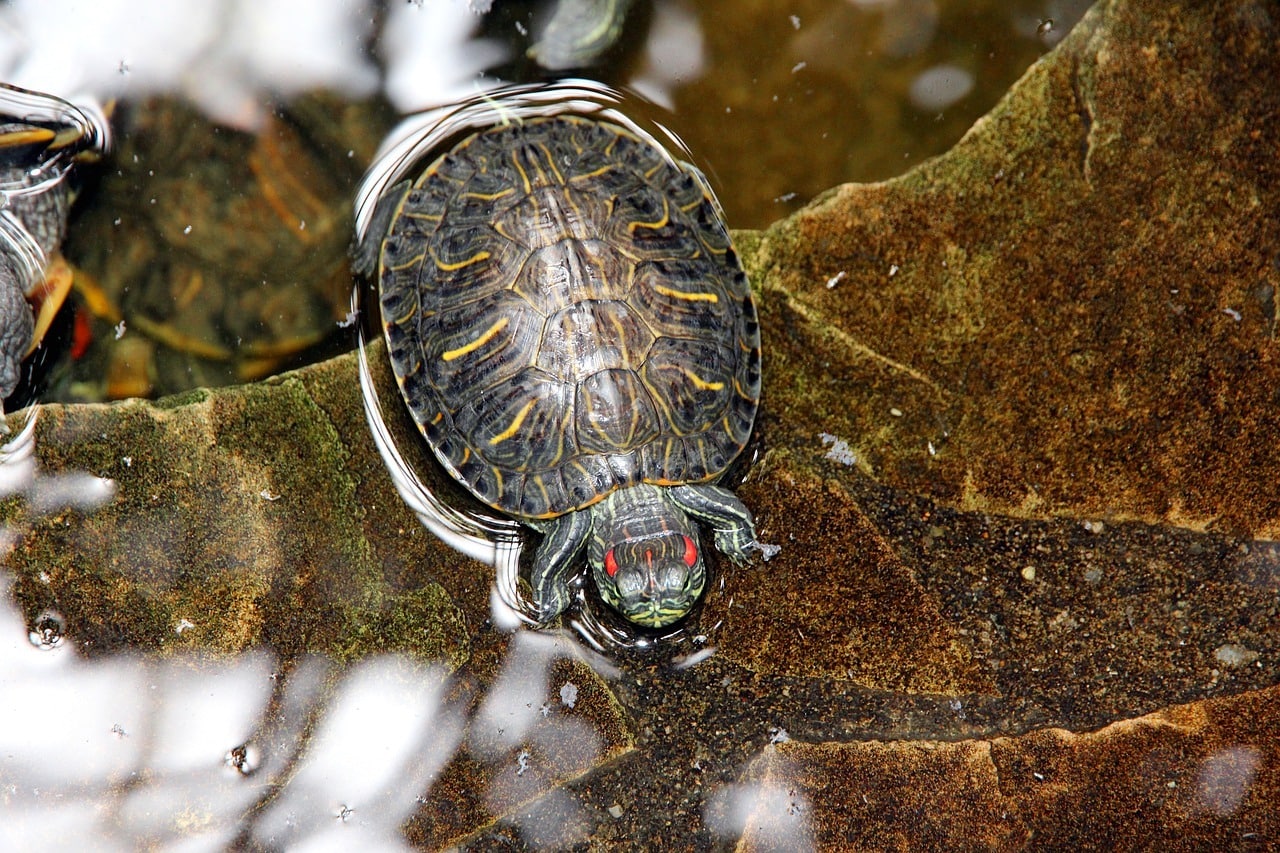
Featured Image Credit: Sean Whaley, Shutterstock