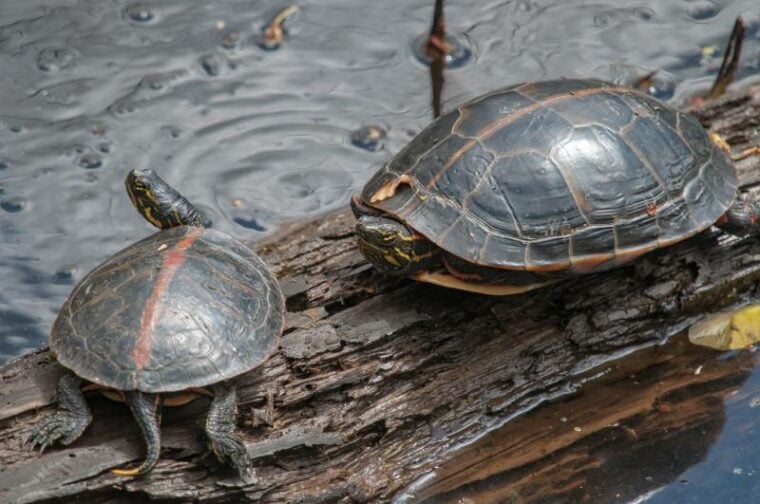
If you’re a turtle parent, you know your turtle needs a basking area. A basking area allows your tiny friend to take a break from the water to relax and also get in some much needed UVB. While you certainly can buy a platform to set up as one of these, you might prefer to DIY a turtle basking area as it will probably be cheaper (and it’s definitely more fun!).
DIY turtle basking areas can be made with various materials, such as PVC pipes, wood, and egg crates, and many are simpler than you might think to put together. If you want to make a turtle basking area for your pet, you’re in luck because we have 15 DIY plans you can build today. They range in level of difficulty and materials used, but you should be able to find one you’re comfortable with making on this list.
The 15 DIY Turtle Basking Areas
1. PVC Turtle Dock by Instructables

| Materials: | 1-1/2″ PVC piping, PVC Cement, PVC Cleaner |
| Tools: | Pipe cutters (or PVC cutters), tape measure, clamps, marker, protective gloves |
| Difficulty Level: | Easy |
If you’re looking for a turtle basking area that’s easy to assemble, this PVC turtle dock could be just the thing for you. It requires minimal materials, and you’re essentially just cutting and gluing those materials together. This basking area might not be the prettiest one out there (though you can probably jazz it up some if you want), but it works.
Do be careful with measurements, though. As you can see in the picture of the finished product here, this person’s turtle dock didn’t quite reach the bottom of their tank, resulting in them needing to add something else at the bottom for the turtles to climb on to reach the PVC piping!
Note: PVC begins to lose its structural integrity with repeated exposure to heat. Therefore, this DIY project will not have an incredibly long shelf life if used with heat-producing lamps. It is best to use this with a non-heat UVB lamp (though, your turtle will need a separate heated platform for temperature regulation as well).
2. Egg Crate Basking Box by Draco the Dragon
| Materials: | Egg crate, zip ties |
| Tools: | Branch cutter, permanent marker, scissors, tape measure |
| Difficulty Level: | Easy |
Here’s another simple DIY turtle basking area! This one involves cutting out multiple pieces from a plastic egg crate to make a box and a ramp, then using the zip ties to put it all together. Again, you’ll need precise measurements for your tank so you know how big to make this egg crate basking box, but once you have those, this shouldn’t take longer than maybe a half hour to create. The video is a breeze to follow along with, as well!
The result is a functional basking area that should be relatively easy for your turtle to grasp onto and pull themselves up.
3. Acrylic Basking Area by Long Live Your Turtle
| Materials: | Acrylic sheet, suction cups |
| Tools: | table saw or acrylic scoring tool, drill, tape measure, heat gun |
| Difficulty Level: | Easy |
This acrylic basking shelf is a versatile and durable project that can provide a resting area and cave to hide in all at the same time. It does require investing in some products and many tools that you won’t necessarily have around your home, but the end product should last your turtle a long time and be very functional.
4. Tile Basking Area by Happy-Go-Lovely
| Materials: | Plastic patio tile with a connecting edge, old basking platform, suction cups |
| Tools: | Wire, nylon cable ties, utility knife, hacksaw blade, pliers |
| Difficulty Level: | Easy |
This tile basking area uses an old basking platform as a ramp to the new one (and the suction cups from the old one). But if you don’t have a prior basking platform, you can make a ramp with an egg crate, PVC pipe, or whatever else fits your fancy. As long as it can be attached to the plastic patio tile with the nylon cable wires, it will work. And if your patio tile is large enough to fit snugly in your tank, the suction cups might not be needed either.
Overall, this basking area is pretty simple to put together, but it is a bit time-consuming. However, it can be well worth it, as tile tends to hold heat for quite some time, allowing your turtle to enjoy a warm spot even after their heat lamp is switched off.
5. Egg Crate & PVC Pipe Basking Area by Amanti Productions
| Materials: | PVC pipe, PVC fitting, egg crate, play sand, zip ties |
| Tools: | Pliers, cutters, needle nose pliers, tape measure, cutting pliers, pencil, PVC pipe cutter |
| Difficulty Level: | Easy |
This basking area incorporates two materials we’ve seen in separate basking areas before—egg crates and PVC pipe—into a single one. With this one, the PVC pipes will prop up the egg crate portion of the basking area. It’s also just as simple to put together as the other DIY basking areas we’ve had so far! Plus, with the PVC pipes, this basking area is exceptionally sturdy, so your turtle stays safe.
This blog also has a DIY plan for an above-tank egg crate basking area if that’s more your thing.
6. Plastic Bin Basking Area by The Turtle Girl
| Materials: | Plastic bin, zip ties, wire hanger, piece of plastic, shelf liner (optional) |
| Tools: | Power drill, L brackets, cutting tool |
| Difficulty Level: | Easy |
Sometimes, an above-tank basking area is best for your turtle, and this basking area made from a plastic bin makes having one a breeze. It’s literally just a plastic bin with a piece cut out and made into a ramp so your turtle can get into it. Wire hangers help keep the ramp held down, and once you’ve fixed up the plastic bin, you just attach it to the wall above your turtle’s tank with the L brackets. You can even put stuff inside for your turtle if you want!
Above tank basking areas can sometimes be complicated to assemble, so if you’d like one but don’t want to do much work on it, this one is an excellent option.
7. Acrylic and Aluminum Basking Tank by Makes and Skates
| Materials: | Acrylic plastic sheets, acrylic plexiglass sheet, painting tape, aluminum angles |
| Tools: | Acrylic cutting tool, blowtorch, jigsaw, clamps, superglue |
| Difficulty Level: | Difficult |
Note: Can only be used with non-heat UVB lamps!
If you want to make something more challenging, this acrylic and aluminum basking tank might be a good fit. This basking area looks more like an aquarium, so it’s much nicer looking than some of the other designs on this list. But it does require a bit of work and some power tools. It isn’t as difficult to put together as it looks at first because you’re mostly cutting out acrylic and supergluing it all together with the aluminum angles. But you do have to use a blowtorch to make the ramp to the basking area.
This basking tank is definitely worth the time and energy it takes to make it, though!
Wooden Basking Areas
Note: Wood is not as thermogenically effective as rocks, tiles, plastic, or other materials used for basking spots. It is also organic and therefore, will eventually decompose. This process is faster if wood is submerged or in contact with water.
8. Wooden Turtle Dock by Mr Turtledude
| Materials: | Wood boards, wooden sticks |
| Tools: | Drill, hot glue gun |
| Difficulty Level: | Easy |
Wooden basking areas can sometimes look much nicer than ones made from egg crates or other materials. This one is pretty simple to put together, too! You’ll require a piece of plywood (which can be easily found at most hardware stores). Once you have that, it’s just a matter of finding the right height and putting it in your tank!
9. Bamboo Basking Area Pawty Time
| Materials: | Sticks of bamboo, string or rope, suction cups |
| Tools: | Tape measure, superglue, scissors, hacksaw (optional) |
| Difficulty Level: | Easy |
This is definitely one of the cuter basking areas on this list! It’s also one of the easiest to create. All you need are some sticks of bamboo, which you’ll glue together. Then, attach suction cups to the side so the bamboo plank doesn’t float around constantly, and you’re done!
This platform seems to be super easy for a turtle to climb up on, however, it’s still best to offer your pet a ramp to access the platform.
10. Simple Basking Area by pattasy
| Materials: | Raw cork bark |
| Tools: | Saw, measuring tape |
| Difficulty Level: | Easy |
This might just be the easiest DIY on our list! All you need for this one is some raw cork bark (this woman found hers on Etsy). You need to get a couple of larger pieces of the cork bark because you’ll cut them down to fit into your tank. Cutting them is literally all you need to do here. The idea is to cut the cork bark to the point where it fits snugly into the tank all on its own—no suction cups or anything else needed!
This basking area really couldn’t be simpler, so if fast and easy is what you need when it comes to DIYing an area for your turtle, this is definitely the plan for you.
11. Floating Basking Area Mr Turtledude
| Materials: | Wooden dowel, 1×8 wooden board |
| Tools: | Drill, tape measure, hacksaw, hot glue gun, pencil |
| Difficulty Level: | Easy |
Here’s an extremely cheap and easy way to make a floating basking area for your turtle! You’ll need a bit of wood and a couple of wooden dowels to construct this one; essentially, you’re connecting two pieces of wood with the wooden dowels. That’s pretty much it!
This basking area might work best for smaller turtles, though, rather than large ones. A turtle that’s too heavy might cause this floating platform to sink.
12. Above Tank Wooden Basking Area by ChiefSweetsUniverse
| Materials: | Two 8-ft kiln-dried pine pieces of wood, dowels, screws, wire mesh |
| Tools: | Saw, measuring tape, drill, staple gun, wire cutters |
| Difficulty Level: | Moderate |
This above tank basking area looks great once finished, but it does require some cutting and drilling to get there. If you aren’t up for cutting the wood, you can probably have it cut to size wherever you get it. Even the drilling part isn’t too difficult for this one; this area just takes time to make. Once finished, though, you’ll have a fantastic basking area for your turtle where you can watch them enjoy their heat lamp.
This basking area also requires you to have an actual object for your pet to bask on (the guy in this video used a pre-made one), so be aware of that.
13. Basking Area and Ramp by DFW Crafts

| Materials: | Cork bark tile, acrylic plexiglass, aquarium-safe silicone sealant, epoxy |
| Tools: | Heat gun, caulk gun, layout tool, level, acrylic cutting tool, measuring tape, rubbing alcohol, clamps |
| Difficulty Level: | Difficult |
If you’re prepared to put in a lot of work for your turtle’s basking area, take a look at this area and ramp. You’ll make an acrylic box with extra-long walls (so your turtle can’t climb out), then add an acrylic and cork bark ramp for them to get into the box. While the end product looks fabulous, you’ll need plenty of tools and time to construct this one. It’ll take you a few days to put this together, but your turtle will surely be delighted by it!
14. Above Tank Basking Platform by Long Live Your Turtle DIY Reptiles
| Materials: | Wooden boards, acrylic sheets, plywood, aquarium silicone, vinyl adhesive tiles, glue, small wood door knobs, wood putty, plastic track set |
| Tools: | Jigsaw, heat gun, paintbrush, drill, tape measure, putty knife, clamps, paint, screws, corner brace |
| Difficulty Level: | Difficult |
This platform is not only the most difficult one to make thus far, but it’s also more expensive than the others on this list. It looks fantastic once finished, though, so if you have the skills and the time, this is one DIY challenge you may want to take up. The video for this platform gives excellently detailed instructions, and there are blueprints you can use.
If this design isn’t the right size for you (it was made for a 75-gallon tank), you should be able to easily get it to the size you want with a few adjustments.
15. Overtank Basking Area by
| Materials: | Recycled pallet wood or wooden boards, nails, screws |
| Tools: | Hammer, measuring tape, saw, drill |
| Difficulty Level: | Difficult |
This is another basking area that’s difficult to put together, as it requires some serious handyman skills. You don’t need a lot of material for it, but you will need some serious tools. The guy in this video has a plan he drew out for this basking area (shown in the video), and he filmed the entire process of how he put it together. He doesn’t do a step-by-step walkthrough, though, so it might be simpler to create this if you already have a general idea of woodworking.
The end result is very solid, though, and looks nice. It’s also easy to fit onto the tank.
Conclusion
You could buy a basking area for your favorite turtle pal, but it’s much more fun (and sometimes cheaper) just to DIY it! The plans on this list for DIY turtle basking areas are, for the most part, fairly easy and inexpensive to make. There are some outliers, of course, so if you’re up to taking on a real DIY challenge, there are plans for that, too. Whatever you make, your turtle is sure to love it!
Featured Image Credit: Mike Wilhelm, Shutterstock


