Alpacas are fascinating animals. They are often used as therapy pets or hiking partners, they generally poop in the same spot as their last poop making them easy to house train, they hum, they can’t shed their coats, and they’ve been around for thousands of years. Since the beginning of their existence, they’ve needed humans to remove their thick winter coats, and in turn, humans have used their fiber for scarves, blankets, and other accessories that keep them warm.
Shearing an alpaca isn’t something that humans do out of greed or cruelty. In fact, both humans and alpacas benefit from each other. Alpacas aren’t bred for their meat, only for their coats, and, because alpacas can’t shed it themselves, they need people to shear them once a year, after the winter months. If an alpaca isn’t sheared, they can overheat, develop skin problems, and get very sick. There is no doubt that shearing this breed is necessary. However, how you do it is important because it can either cause stress to your alpaca or be a quick, relatively easy process for both of you.
Shearing an alpaca requires a bit of research, preparation, and the right equipment. For the best outcome, keep reading—we’ve got five simple steps on how to shear an alpaca to help you out.
Preparation
Shearing an alpaca is no small task, and you may need to start the preparation the day before. Here are a few pre-shearing tips to help you better prepare.
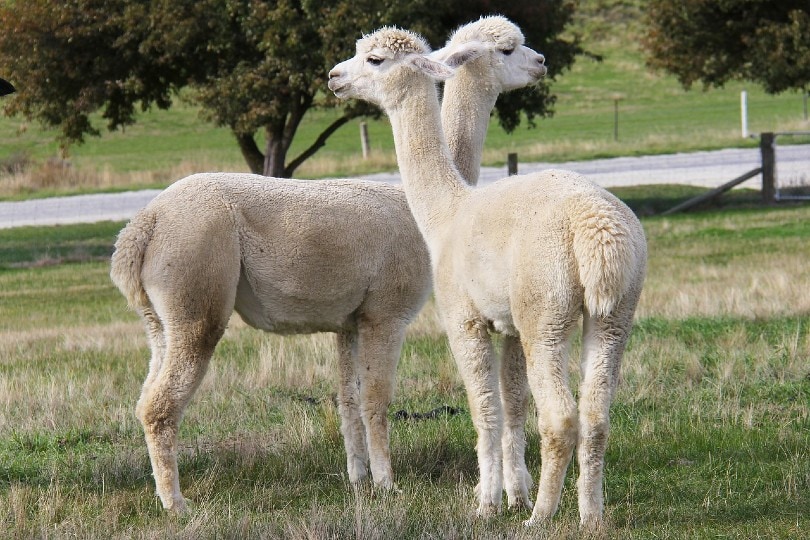
Image Credit: Thomas Devenish, Shutterstock
Keep Them Dry
Your alpaca cannot have a wet coat or skin when you shear them. Many people like to wash the fleece before “shearing day” so that it’s easier to shear the alpaca and have clean fiber to work with afterward. If you do wash your alpaca, do it one or even two days in advance because it takes time for the fleece to dry.
If you struggle to keep your alpaca out of the rain, puddles, or mud, keep them in the barn until they’ve been sheared.
Clean The Area
Have you ever tried removing bits of straw from a wool sweatshirt? It’s difficult and takes time. Now, imagine trying to remove straw from the enormous bundle of fiber you’ve just sheared off your alpaca. Save yourself an unnecessary challenge by sweeping away all the straw and dirt from the floors where you’ll be shearing, such as the barn.
Image Credit: Pixabay
Clean The Coat
For ease of shearing, make sure there aren’t any sticks, plants, or straw in your alpaca’s coat. It’s always better to vacuum their coats just before shearing to remove any debris.
Keep Them in a Secure Area
It may help the process if you keep your alpacas in a smaller, secure area close to where you’re going to shear them. The process of catching your alpacas can be quite stressful, especially if it’s right before being tied down and sheared. Rather let them feel calm before shearing with as little extra excitement as possible.
In saying that, also keep other unfamiliar people and animals away during the shearing process to lower stress. Having dogs running around, children laughing, and other loud noises are going to unsettle your alpaca.
Image Credit: sharonang, Pixabay
Get Your Bins Ready
Get three bins ready for the different sections of your alpaca’s coat. Make sure to add their name to it, along with the year and section of coat you’ll be placing in it. Once your alpaca is sheared, you should put its fiber in the bins before another alpaca is brought out to avoid cross-contamination with your other alpaca’s fibers.
Remember to start shearing alpacas with light coats before the ones with darker coats to avoid colors being mixed in with each other.
Get Their Treatment Ready
No animal enjoys receiving their necessary shot, so get them all over at the same time. It’s easier to get it all done while your alpaca is distracted and restrained. Make sure to have all the immunization shots and deworming treatment lined up, along with any other quick grooming you want to be done, such as hoof and dental trimming.
Image Credit: gabio, Pixabay
Pair Them Up
We’ve found that keeping the alpacas that always stick near each other together through the process keeps them calmer. Having a buddy during stressful times always helps! Keep them in the same holding area together and make sure they get sheared right after each other so that they can get back together quickly. It might sound weird, but try it out, and you’ll notice the difference it makes.
The Shearing Process (5 Steps)
The less experience you have shearing an alpaca, the longer it’ll take. However, once you’ve got your way around it, it should take around 5–10 minutes. You’ll need someone to help you with the shearing process as it’s very difficult to do alone and could result in you or your alpaca getting hurt.
Before shearing for the first time, hire a professional to show you how it’s done. Ask questions and make notes. Once you’ve seen how to do it, it’ll be much easier to do it yourself. Another way to make the process easier is by following these simple tips on how to shear an alpaca.
There are various ways to tie your alpaca. It can be done on the ground, on a table, or while standing. Standing is typically the least stressful option for your alpaca but the most dangerous because you don’t have as much control over the animal, and there is a higher chance of injury for them, you, or anyone else that is helping.
The safest option is shearing them on the ground. Firstly, lay them on the ground on their side, along with the help of one or more people. Tie ropes to both the front and back legs and secure them to a pole positioned on either end of their body, keeping the front and back legs apart. This setup is the safest because the alpaca won’t be able to fight their way out and get cut by the shears while doing so. Make sure someone is always holding the alpaca’s head.
While your alpaca is restrained, you can give them their shots and clip their hooves and teeth.
2. Shear In Sections
This is the part where you need to grab your electric shears and get going. The first section to remove is the blanket, which is the top section of your alpaca that can be used or sold because it’s typically softer and hasn’t experienced too much mud.
Next, shear the fiber off the alpaca’s head, feet, legs, and the other unshaved areas.
Image Credit: Amazon
3. Bin The Fiber
Step three goes hand in hand with step two. Once you’ve sheared each section of the coat, add that section to the labeled bin you’ve prepared for the fiber. The blanket, or top section, should be added to one bin while the fiber on their neck and underbelly should be placed in another bin. The seat and leg fiber can be placed in the last bin.
The last two bins are likely to have the coarsest fiber in them, while the first bin will have the fiber used in scarves and sweaters.
4. Release Your Alpaca
Try to make the shearing process and time of restraint as fast as possible. Once you’re done shearing the alpaca, loosen the ties and cut them off their legs, allowing them to get up and join the others.
Some alpacas will react to the process better than others. Some will spit and make heartbreaking sounds, but they’re just a little scared and otherwise fine.
After shearing, put your alpacas into a waiting area to drink water and calm down with other alpacas after their ordeal. If the weather is cold, get a few blankets ready to put on your alpacas. Otherwise, just keep an eye on them, let them soak up the sun, and make sure they also have a section of shade, food, and water.
An alpaca cannot shed their winter coat and needs to be sheared to prevent skin conditions, overheating, and other illnesses. Makes sure to do a lot of research, watch how to shear an alpaca, have helpers, and be fully prepared before attempting to do so yourself. Remember to place them on a surface on their sides, tether their legs together, shear their blanket first and then the rest of their coat, to bin the fiber, and monitor them afterward.
If you have many alpacas, you’re going to be shearing for hours, so make it fun, have snacks for you and your helpers, and make sure your alpacas are happy and well cared for.