Grooming is an integral part of being a responsible dog owner. This includes brushing, bathing, and, of course, trimming their nails. Clipping a dog’s nails can be daunting, especially if you are concerned about accidentally harming them. Cutting the quick of their nails can cause bleeding and pain, but thankfully, there are products designed to limit those risks.
Some canine nail clippers are sold with a safety guard attached and are designed to prevent you from cutting too far up on the nail. If you want to learn more about this type of clipper and how to use it, keep reading for our nine tips.

Before You Start
Jumping straight into clipping your dog’s nails without preparation may not end well. Therefore, you will want to take the time to gather the proper supplies and prepare your dog for the process.
Gather Your Supplies
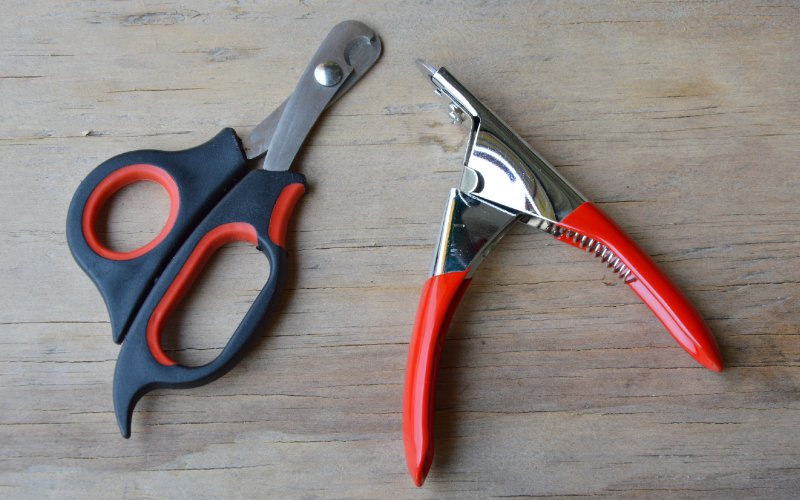
Many canine nail clippers are available; however, not all have a safety guard. While searching for nail clippers, review the features offered to ensure a safety guard is among them. An excellent example of a dog nail clipper with a safety guard is Boshel’s Dog Nail Clipper.
Another item you need before starting is styptic powder. Styptic powder dulls pain and stops bleeding if an accident occurs while trimming your pet’s nails. You can use Dogswell’s Remedy+Recovery Professional Groomer’s Styptic Powder.
Prepare Your Dog
Preparing your dog for nail clipping can take time and patience. Many animals are naturally uncomfortable with people touching their paws. This can make clipping your dog’s nails challenging, so you should take steps to desensitize your dog to the procedure. By handling your dog’s paws and giving them treats, you can help them feel comfortable with people touching their paws.
Once your dog is comfortable with being handled, you can introduce the clippers to them. Allow your dog to sniff the nail clippers, then give them a treat. This will create positive associations with the clippers.
You’ll also want to introduce your dog to the sound the clippers make. Take a piece of uncooked spaghetti and use the clippers to chop it. Then, give your dog a treat. Again, you are reinforcing the idea that the clipper (and the clipper’s noises) are not scary.
When your dog is comfortable with the clippers, you can trim one nail. If your dog is quite nervous about the situation, stop there and give them a treat. Trim one nail daily, giving your dog a treat once done successfully. This allows your dog to grow comfortable with the sensations gradually. After your dog has grown accustomed to it, you can begin trimming their nails regularly.

The 9 Tips for Using Dog Nail Clippers With a Safety Guard
Using a new tool to care for your dog’s nails can be stressful. Thankfully, using a nail clipper with a safety guard isn’t much different from using the average canine nail clipper. Follow these tips to put your new canine nail clipper to the test.
1. Know When to Trim
The first step in trimming your pet’s nails is knowing when it is time. On average, dogs need their nails trimmed every 4 to 6 weeks. However, this can vary depending on your dog’s lifestyle.
For instance, a dog that often runs on pavement, rocks, or other tough surfaces may only need their nails trimmed every few months due to the natural wear that their environment provides, or they might just need their dew claws trimmed occasionally. As for pampered lap dogs, nail clipping may be needed more frequently. If your dog’s nails touch the ground when they are standing, they probably need their nails trimmed, but it is important to be sure they need cutting first. If you are unsure about this, your vet can help you recognize when it’s time for your dog to have a trim.
2. Find a Calm Location
Nail trimming can be an overwhelming experience for many dogs, so finding a calm location is essential to the process. If you try to clip your dog’s nails in a busy, loud, or chaotic room, your dog will likely become stressed and restless. You may even accidentally injure your dog if they move or if another person bumps you.
Therefore, it is best to find a private location and shut the door. If your dog is agitated or excited, settle them down before you begin. Having your dog in a relaxed state is ideal to make the process easier.

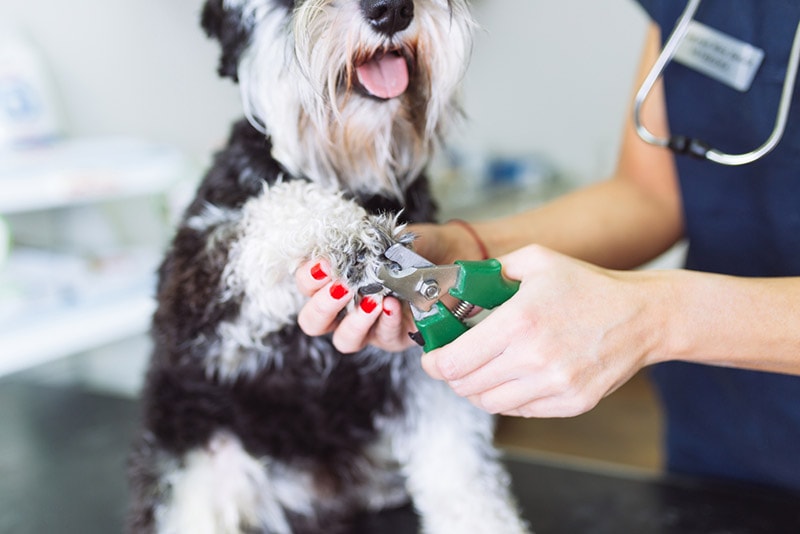
3. Position Your Dog and Hold Their Paw
Use whatever position works best for you and is most comfortable for your dog. Some pet parents like to sit beside their dogs, sliding their hands under and around their dog’s legs to hold their paws. Others prefer to sit behind their dogs and move their paws backward so the bottom of the foot is visible. You might find it easier with another person holding your dog, while you focus on the feet. Find a position that works best for you and your pet, and stick with it.
4. Find a Clear View of the Nail
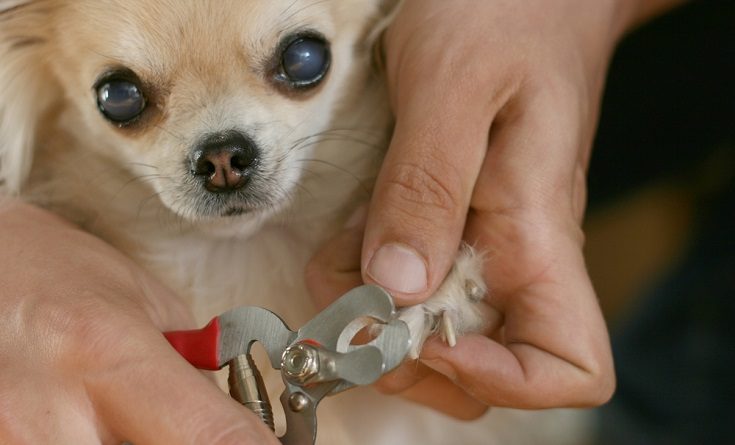
Once you have your dog’s paw in hand, pick one nail. Expose the nail by pushing their fur aside. You can bring the nail out by pushing your finger against the pad and holding your thumb on the top of the toe. Gently increase the pressure until the nail has extended.
5. Decide Where to Cut
When trimming your dog’s nails, it is essential to avoid cutting the quick. Cutting the quick can cause pain and bleeding. This is where your canine nail clipper’s safety guard will come in handy. Different clippers may have various functions for their safety guards, so check the instructions for your product.
Generally, the safety guard can be easily clicked into place and secured behind the clipper’s blades. A small space will exist between the safety guard and the blades, allowing only a fraction of your dog’s nails to pass through the blades. This safety measure helps you to avoid injuring your dog.
If your dog has white nails, avoiding the quick is easier. Often, the quick is visible inside white nails, and it’s simple to stop cutting before hitting the pink line. If your dog has black nails, avoiding the quick can be more difficult. The best way is to turn the paw so you are looking at the underside of the nail. This way, you should be able to see the section of the nail that doesn’t have a fleshy quick behind it.
6. Using the Safety Guard
It is important to be aware that the safety guard will not necessarily prevent you from hitting the quick, it only serves to limit how much of the nail you can cut off. So if the guard is at 5mm, but the quick is only 3mm from the end of the nail, you can still end up catching it. The guard just stops you from taking a big chunk in one go.
7. Cut at the Correct Angle
When cutting your dog’s nails, think about how they will rest when your dog is standing or sitting upright. Their nails should be parallel to the floor, meaning you will need to cut at a 45° angle. If you cut straight across, your dog’s nails will not be the proper shape.
8. Know What to Do if You Cut the Quick
If you accidentally cut the quick, do not panic. Even with precautions, accidents happen, so it is best to be prepared. This is where the styptic powder comes in. Place and hold styptic powder on the injury for a few seconds. It will stop the bleeding and dull the pain.
9. Reward Your Dog
Don’t forget to reward your dog after you’re done. Treats are a great way to promote a positive association with nail clipping or any other grooming, for that matter. Just make sure you give the treat promptly so your dog creates a positive association with the correct event.

Final Thoughts
Trimming your dog’s nails can be daunting. Nail clippers with safety guards are a great way to stop you from accidentally taking too much nail off, but they aren’t a complete guarantee. If an accident does occur, don’t beat yourself up; you can treat a bleeding paw with styptic powder, and your dog will forgive you! If the idea of trimming your dog’s nails is too overwhelming for you, reach out to a professional groomer or vet for support and advice.
Featured Image Credit: Oleggg, Shutterstock