Bearded dragons are social and interesting reptiles that many people own. It can be overwhelming trying to find affordable décor for your beardie’s enclosure, though. Commercially produced tank décor can be pricey, and it may not always be built to last for the price you pay.
One of the ways you can get past this issue is by making your own DIY décor items for the enclosure. Here are some of the best ways you can make your bearded dragon’s tank more natural and enriching.

The 10 DIY Bearded Dragon Enclosure Ideas
1. Fake Basking Rock by Instructables

| Materials: | Styrofoam, grout mix, cement color, expanding foam insulator, water, water-based polycrylic satin sealer |
| Tools: | Knives, hand saws, hot glue, hot glue gun, bucket, paint brushes |
| Difficulty: | Moderate to hard |
This fake basking rock will bring a sense of realism to your beardie’s enclosure without breaking the bank. The most important part of this project, though, is taking the time to plan ahead. You need to have a clear vision drawn up to guide you in making the basking rock. Otherwise, you may just end up with a mess on your hands.
This is a great project if you’ve got a few days to work on it. You can customize it to fit the enclosure, as well as the other décor in the enclosure or a specific look you’re going for. No matter how it turns out, your bearded dragon will love having a new basking rock that was built just for them.
2. Homemade Basking Rock by Bearded Dragon Advice

| Materials: | 1” Styrofoam board, grout, Styrofoam safe glue, Mod Podge, water-based waterproof sealer |
| Tools: | Knife or small hand saw, pins |
| Difficulty: | Easy to moderate |
This homemade basking rock is an easy project that you will most likely be able to put together in a day or two. Make sure to provide adequate drying time for all of the elements before adding it to the enclosure, though. You will also need to make sure it fits the space correctly, so make sure to try it out in the enclosure once it’s held together with pins before you start gluing.
You should make sure to only use glue that is safe for Styrofoam and to properly seal the basking rock with the grout and sealer. This will ensure the Styrofoam doesn’t melt when exposed to the heat of the basking light.
3. DIY Rock Wall by Gecko Time

| Materials: | 1” Styrofoam board, toothpicks, joint compound, liquid nails, textured stone spray paint, protective sealer |
| Tools: | Utility knife, tape measure, sharpie |
| Difficulty: | Moderate to hard |
This DIY rock wall project is a great way to create a cool backdrop for your bearded dragon’s enclosure, but it can also double as a basking spot as well. This project, like the previous one, does require some forethought, so make sure to have a clear vision in mind before you get started.
You’ll be able to customize the size, shape, and finished look of this rock wall to best suit your tank’s look and your beardie’s needs. If you already have plenty of basking space, then this project could serve just as a tank backdrop.
4. Fake Rock DIY by Reptile Forums

| Materials: | Styrofoam, waterproof PVA glue, grout, water, sand |
| Tools: | Sharpie, knife |
| Difficulty: | Easy to moderate |
This fake rock project is a great way to create rocks for any part of the enclosure, from cool to basking and everything in between. You can fully customize it to fit the tank, and the instructions even include a small opening for a food bowl to snuggle into.
This project does require the use of sand, which will give it a more realistic stone look. It is important, though, to ensure that the whole project is thoroughly coated in the waterproof PVA glue before and after the application of the sand. This will prevent the sand from becoming loosened and falling from the build.
5. Homemade Hide by Caudata.org

| Materials: | Aquarium-safe silicone, rocks, plastic food storage container, fake plants (optional) |
| Tools: | Scissors or box cutter, sharpie |
| Difficulty: | Easy to moderate |
This homemade hide is a great way to use up supplies you may already have at home from other projects, like silicone and river rocks. Ideally, you should use a new food storage container for this project, but you could also use one that has been thoroughly washed and that you are sure doesn’t have anything on it that may be dangerous for your beardie.
When making this project, be careful making the cuts as cutting through this type of plastic can be difficult. Cutting through the plastic will be the most difficult part of the project, though, and the rest of it could be done by a child if you’d like. Make sure to smooth out any sharp edges to keep your beardie from hurting themselves when using the hide.
6. Excavator Clay Tunnels by Zoo Med Laboratories, Inc.
| Materials: | Excavator clay, water |
| Tools: | None |
| Difficulty: | Moderate |
The excavator clay from ZooMed is a great way to DIY your beardie’s enclosure because you can fully customize the tunnels and mounds to fit your tank. It is important to follow the directions on the product itself, though. When it’s mixed and used correctly, excavator clay will hold its shape and any tunnels you create won’t collapse.
This product is a great way to make a customized tank setup that is in line with the environment that is native to bearded dragons. You’ll be able to help your dragon feel really at home by creating a grassland or desert tank environment.
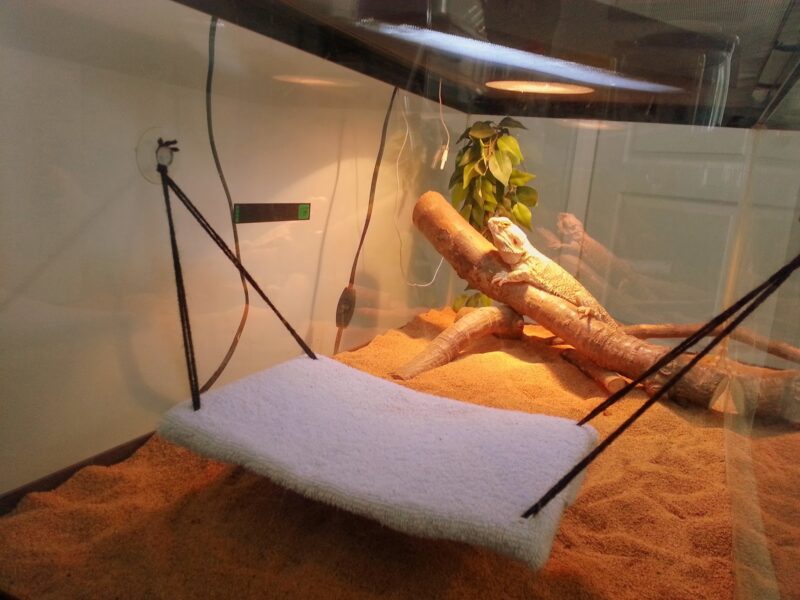
7. Bearded Dragon DIY Hammock by Procraftination!
| Materials: | Thin cardboard, towel or washcloth, yarn, beads, suction cups |
| Tools: | Scissors, packing tape |
| Difficulty: | Easy |
A hammock is a great way to provide enrichment to your beardie, and this DIY bearded dragon hammock is an easy and quick way to supply that. Make sure to position the hammock low enough for your dragon to climb into without too much effort, but high enough that it feels different to them than being on the ground.
Once you’ve put it together, there isn’t really a great way to keep this hammock clean, so it may require regular replacement to keep things hygienic. It is a good way to use up things you usually have around the house that usually go into the trash can, though, like old towels and washcloths, as well as thin cardboard boxes, like those for cereal and crackers.
8. Bridge Hammock by PetDIYs

| Materials: | Square wooden dowels, twine, nuts, suction cups |
| Tools: | Drill |
| Difficulty: | Moderate |
If the soft hammock doesn’t seem like something that your beardie will enjoy, then this DIY bridge hammock might be the way to go. It functions like a hammock but looks like a bridge, although you could also connect it between two points in the tank to make it function as a bridge.
This project isn’t particularly difficult, but it does require the use of a drill. If you aren’t able to find short square dowels, then you will also need a saw that will allow you to cut the dowels to size. Once any necessary cuts are made or holes are drilled, then this project is very easy and shouldn’t take very long to put together.
9. DIY Dragon Ball by PetDIY

| Materials: | Ping-pong ball |
| Tools: | Non-toxic marker |
| Difficulty: | Easy |
One of the best things you can do for your bearded dragon is to find ways to create a more enriching environment. One of the ways you can do that is to provide toys that your dragon thinks are fun and interesting. Balls are a great toy for bearded dragons because it activates their hunting instincts.
When choosing a ball, it’s essential that it is large enough that your beardie cannot swallow it. Ping-pong balls are the perfect size and weight for most beardies to play with, though. This DIY ball toy is extremely easy and will take you just a few minutes to put together so your beardie can start playing ball.
10. DIY Lizard Hides by Reptile Creation
| Materials: | Insulation foam, non-toxic paint, Exo-Terra desert sand |
| Tools: | Knife |
| Difficulty: | Moderate |
These lizard hides are a great way to use up any extra insulation foam you may have from construction projects. This project can be completed in just an afternoon, although you may need to give a little extra time for the paint to drive.
Your bearded dragon will love having these hides in their enclosure, and the insulation foam will help retain heat. You will need to use caution with carving the insulation foam into your chosen shapes, but this is an overall simple project.
Conclusion
These are all great ways to improve your beardie’s enclosure and make it a healthier and more interesting environment. Make sure to take all precautions with your DIY projects, though. All supplies should be safe for your bearded dragon to touch and be exposed to on a daily basis.
See also:
Featured Image Credit: Worraket, Shutterstock