


Your cat isn’t feeling his best, and the vet recommended a collar. As important as it is to follow a vet’s orders, it can be hard to collar our cats, especially when they look so sad with it on. If you want to make the experience less clinical and more adorable, why not DIY a cat cone collar?
Whether you are looking for an easy craft or a slightly tougher challenge, this list has it all. Take a look at the list and see which options suit you best.

The 6 DIY Cat Cone Collars
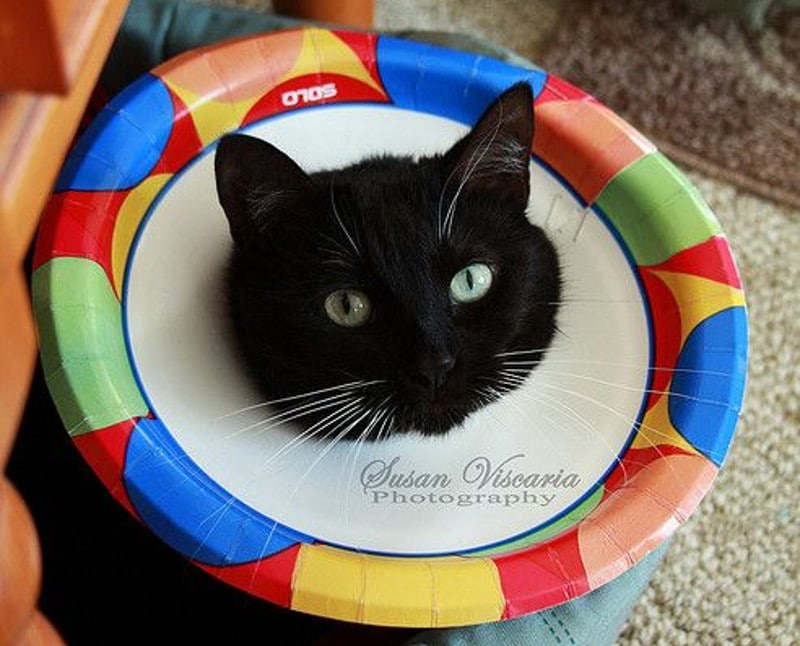
1. The Cat and the Plate Cat Cone Collar
| Materials: | Paper plate |
| Tools: | Scissors, stapler |
| Difficulty Level: | Easy |
The Cat and the Plate is a simple DIY project requiring minimal materials: just a paper plate, a pair of scissors, and a stapler. If you are a DIY beginner, this could be the perfect introductory project.
This plan is as simple as cutting from the edge of the plate to the center and cutting out a circle in the center. Then, you can fit it around your cat’s neck, adjusting as necessary. It is vital to ensure that the collar is tight enough that your cat cannot remove it but loose enough not to choke him. Once you have the correct size, staple the edges of the plate together.
This simple project can take less than 10 minutes and save you a lot of money. It is undoubtedly the most time-effective and cost-effective choice on this list.
2. Foam Kitty Collar

| Materials: | Foam pipe, shoelace |
| Tools: | Electric/plastic tape, calculator, X-Acto knife, measuring tape |
| Difficulty Level: | Moderate |
Make your cat a foam kitty collar if you want to provide him with more freedom. This collar is designed to lessen your cat’s stress by improving his mobility.
However, the improved mobility means that there are some instances in which this collar should not be used. Your cat will still be able to reach his front paws and tail in this collar, so if that is the area that needs to be avoided, then this option is not for you.
You can use electric tape and an X-Acto knife to shape the foam pipe and shoelaces into a collar. You need to calculate the size of your cuts to form a circle with the foam pipe. This may not be the math you can do very quickly in your head, so you will need to have a calculator handy.
3. Soft Elizabethan Collar

| Materials: | Poster board, foam sheet, ribbon |
| Tools: | Measuring tape, pencil, scissors, tape |
| Difficulty Level: | Moderate |
A soft Elizabethan collar is a more comfortable alternative to regular Elizabethan collars. Using a foam sheet as the cone material, this collar keeps your pet comfortable and helps to lower his stress.
For this project, you will take measurements from your cat and transfer them to the foam sheet, sizing it according to your cat’s needs. You will then tape the edges together and use a ribbon to tie the foam collar to your cat’s regular collar if he has one.
If you are considering this option, you should keep in mind that the soft foam material is easily damaged over time. Depending on how long your cat needs to wear the cone, you may need to replace the soft collar from time to time. We recommend using a poster board to create a template for the collar.
4. Poster Board Cone Collar
| Materials: | Poster board |
| Tools: | Scissors, tape, ruler, measuring tape, pencil |
| Difficulty Level: | Easy |
For this DIY project, you will need nothing more than a poster board for your materials. Using scissors, tape, a ruler, a pencil, and a measuring tape, you will measure and shape the poster board to the size that will suit your cat’s neck.
You must be prepared to do a little bit of math, but nothing too strenuous. Beyond the occasional math problems, this DIY project is a simple and quick craft.
5. Pool Noodle Cat Collar
| Materials: | Pool noodle, collar |
| Tools: | X-Acto knife |
| Difficulty Level: | Easy |
For a summer vibe, try the Pool Noodle DIY collar. It is a fast and easy project that comes with adorable results. You must purchase a pool noodle, a collar, and an X-Acto knife. If you would rather swap out the collar with twine or another kind of string, that option is available.
You can cut the pool noodle into small sections with the X-Acto knife. Once the pool noodle has been chopped up, you will string the collar through the holes of the pieces until the collar is full. You need to leave enough room for the collar to be wrapped around your cat’s neck, so the collar should not be totally full. For extra safety and durability, we suggest wrapping each of the foam pieces with electric tape before assembling them together into the collar.
6. DIY Cat Onesie

| Materials: | Shirt |
| Tools: | Scissors, measuring tape |
| Difficulty Level: | Easy |
An excellent alternative to a cone collar is the DIY Cat Onesie. Many cats do not like collars and struggle to adjust to them. If your cat is having a hard time adapting to wearing something around his neck, you may want to try putting something on his torso instead.
A cat onesie is easy to make. It requires a shirt, a pair of scissors, and measuring tape. The shirts are cut into the necessary shapes, including holes for the arms, legs, and head. Instead of sewing the straps together to secure the onesie, the straps can be conveniently tied on your cat’s back for a simple dressing and removal.
This is another excellent introductory DIY project, as it does not require advanced tools.
How to Help Your Cat Adjust to a Collar
No matter how cute or comfortable you can make your cat’s collar, he will likely be wary of it. It is a strange, bizarre contraption in his eyes, so he will not be eager to wear it around his neck.
The best way to ease your cat into wearing a collar is to introduce it to him gradually. Instead of putting it on him right away, you want to start by showing your cat the cone. Hold it out to him so that he has the opportunity to sniff it and check it out. In order to establish a positive association between your cat and the cone, you can offer him treats.
Place the cone on your cat’s neck temporarily. Give him treats and allow him to adjust to the sensation before taking it off. Think of this as a practice run. You may want to repeat this a few times.
Gradually, you will increase the amount of time he is wearing it. If he starts to seem agitated, remove the cone and return to shorter time intervals before slowly working your way back up.
Cone Collar Safety
While your cat is wearing a collar, you have to monitor him closely. He is more likely to become stuck in tight places with a cone on his head, so check under the beds to verify that he is not trapped.
The entrance of the litter box may be difficult to pass through. If you have a lid on his litter box, you may want to remove the lid until the collar is off. Cats should not wear cone collars outdoors. If your cat tends to wander outside, you will need to block his access to the outdoors until the cone can be removed.

Conclusion
When our cats are not feeling well, all we want for them is to feel better. Cone collars are often an important part of the healing process, but they can also be fun DIY projects. Whether you want to make a simple cone or an elaborate project, there are options here for everyone.
Featured Image Credit: Healthy Definition, Shutterstock


